Events lives at Events. It plans one-off functions on a board, staffs them from your team, and fills the gaps from Supp. Each venue can try it free for 30 days from the first event it creates, then it is a monthly add-on (see Pricing).
1. The board
Every event is a card in one of these columns:
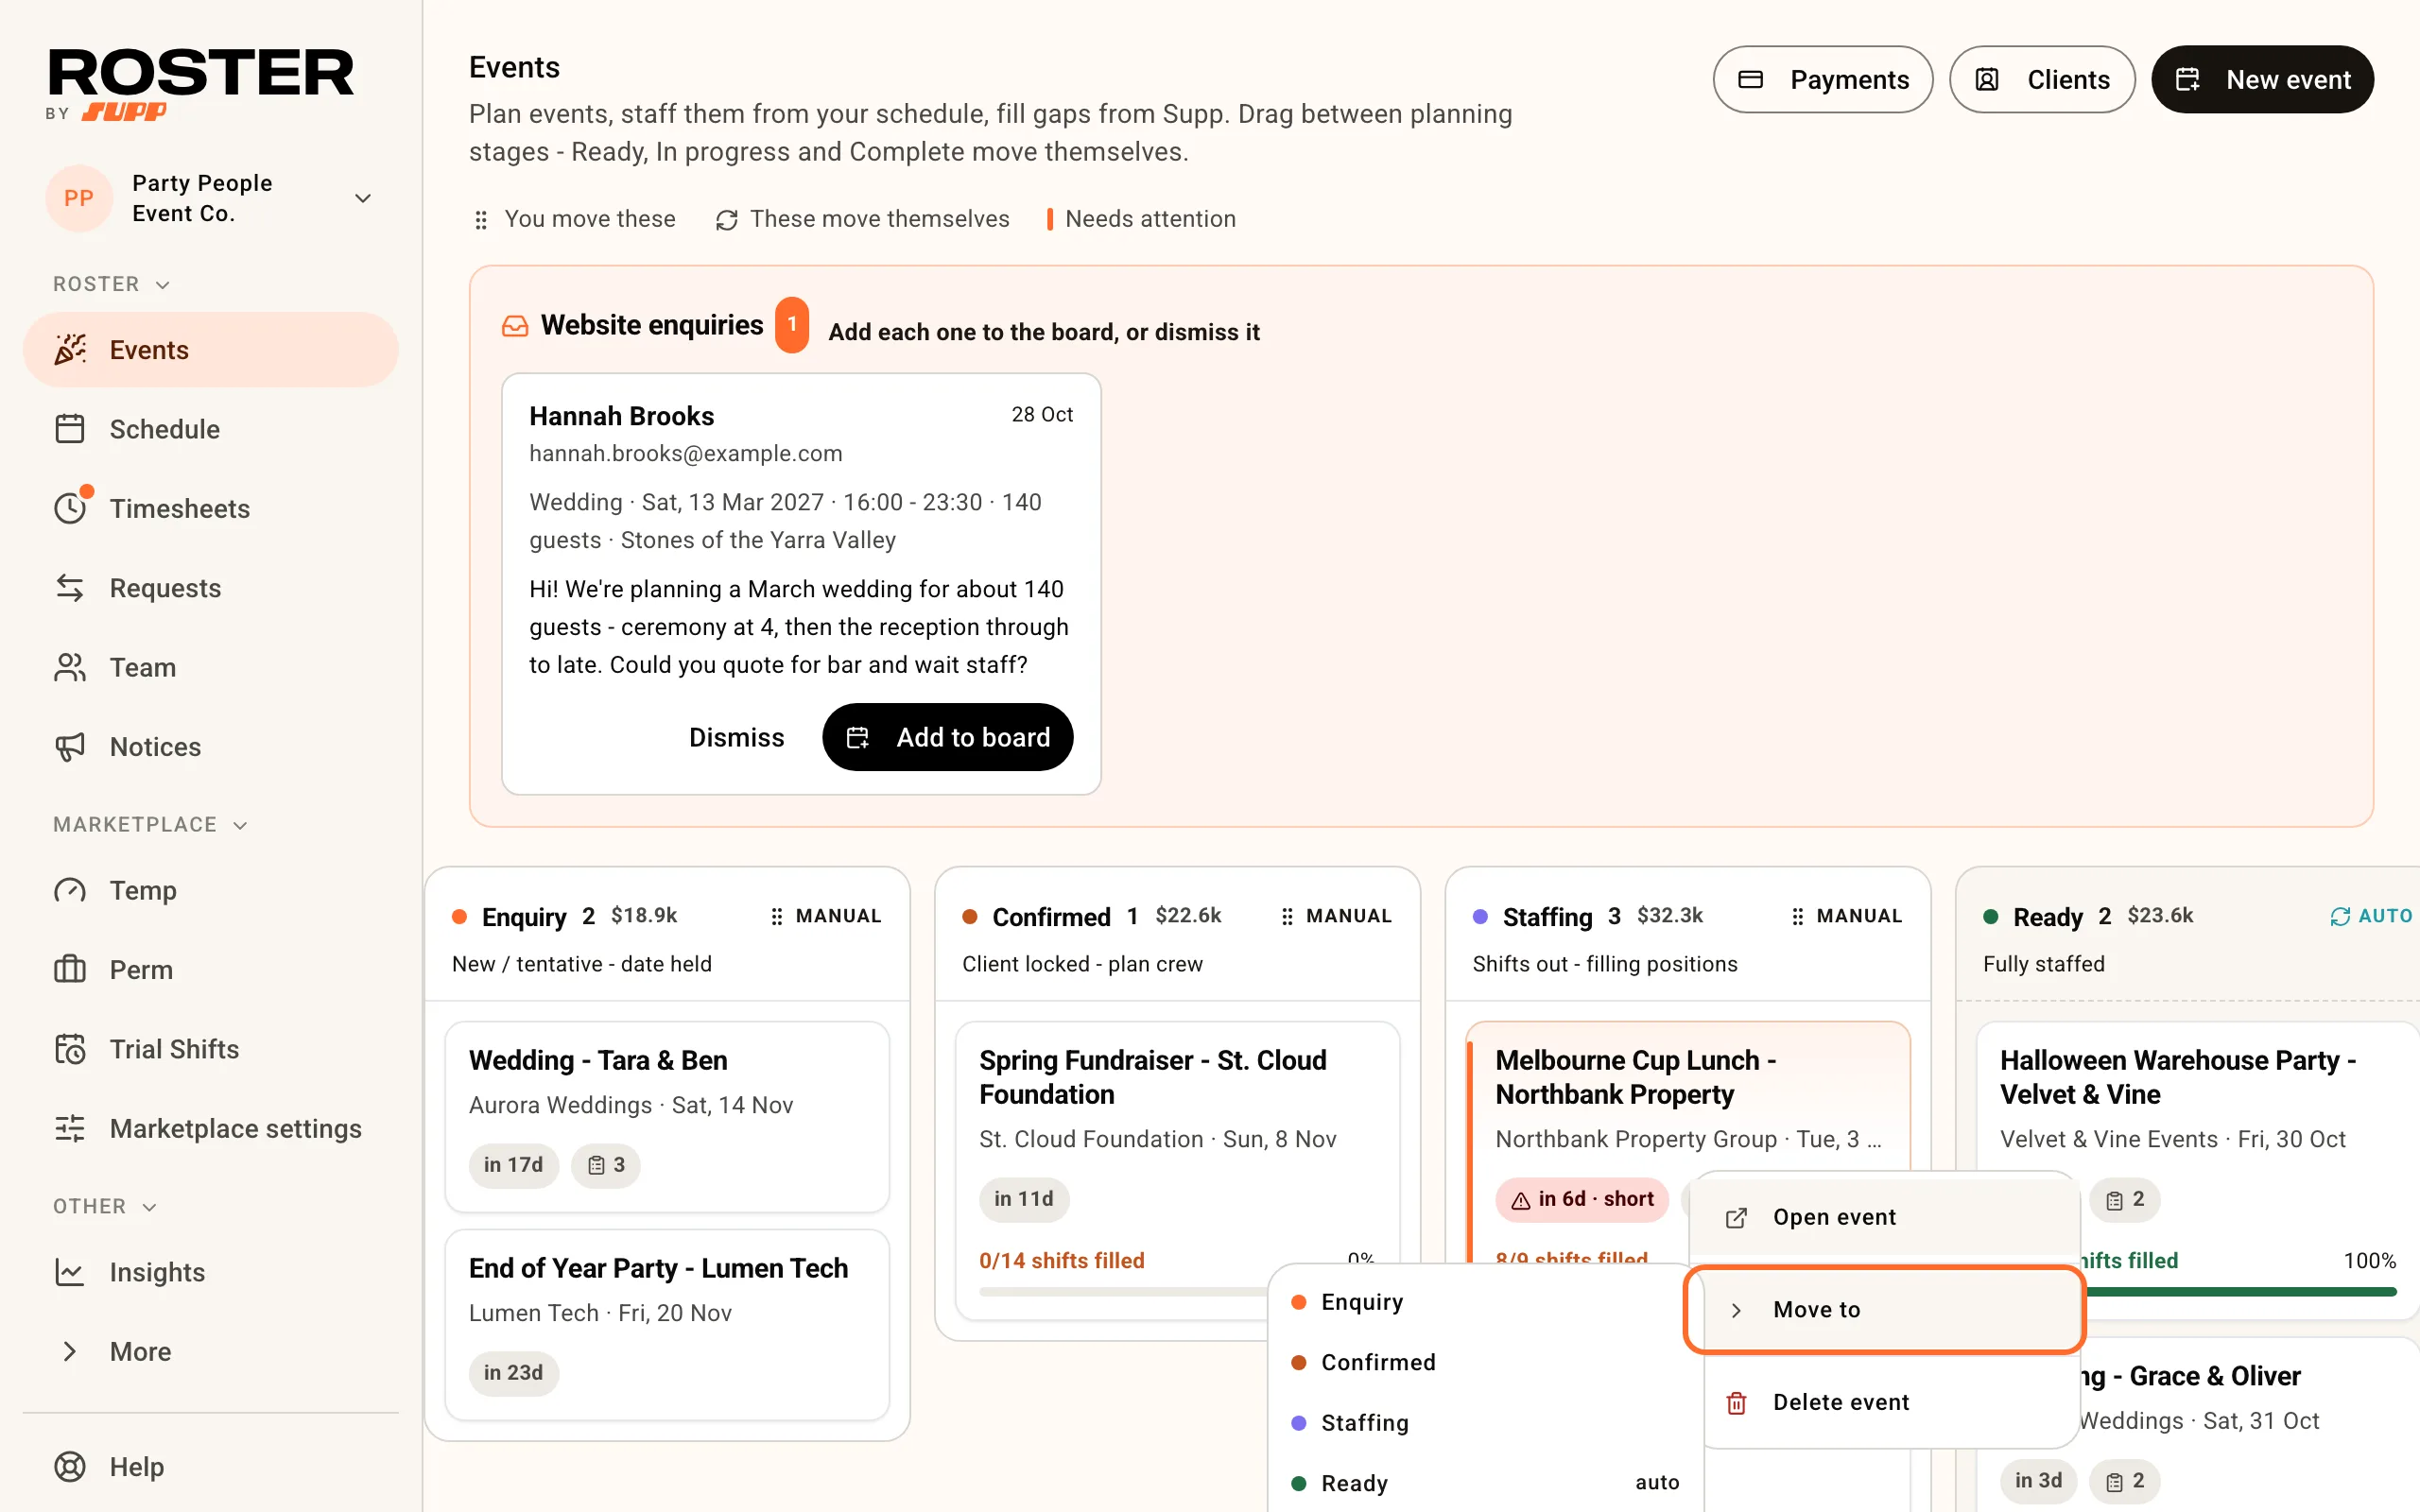
- Enquiry, Confirmed and Staffing - you move these. Drag a card, or right-click it and use Move to.
- Ready, In progress and Complete - these move themselves. An event is Ready once every shift is filled, In progress on the day, and Complete after it ends.
- Cancelled - moving a card here asks for a reason and takes its upcoming shifts off the schedule. Workers who had confirmed are emailed.
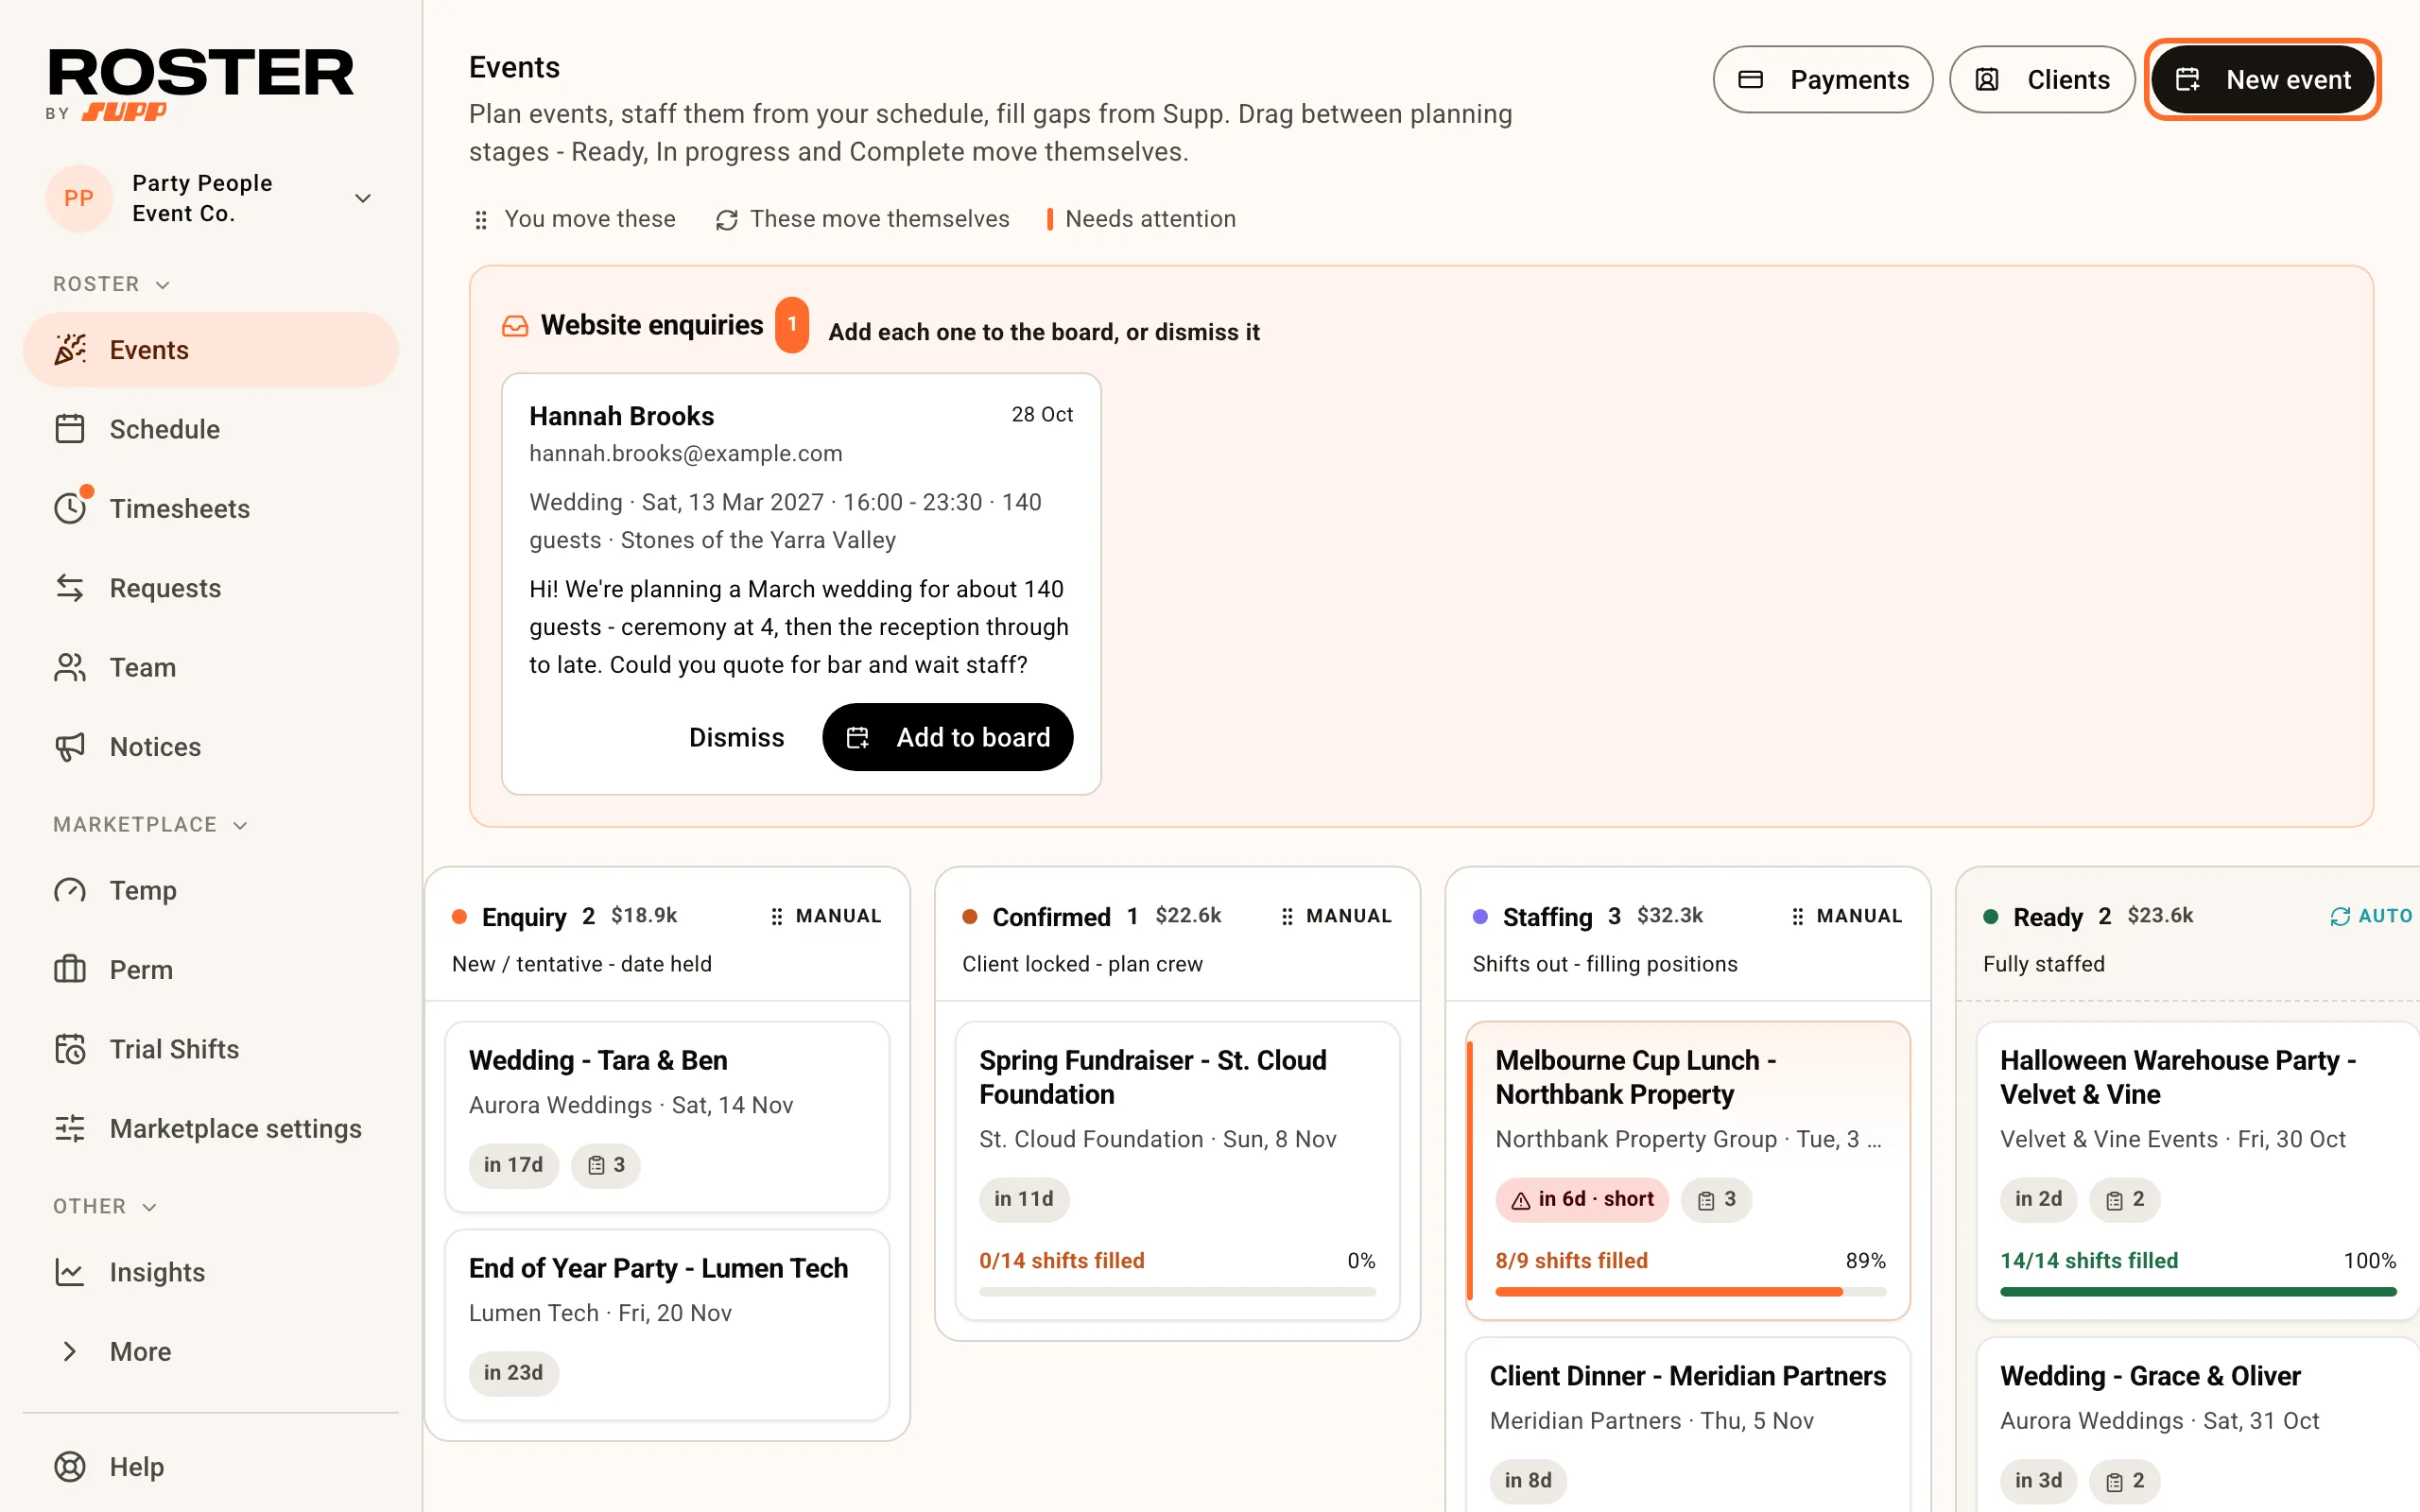
Right-click any card for Open event, Move to and Delete event. On a phone, open the event instead: the stage pill in its header moves it, and Delete event is there too.
2. Set up your event templates
Templates hold the crew plan and checklist you reuse: which roles, how many, what times, what each costs, and the tasks that come with that kind of event. They sit under Event templates below the board.
+ New template opens the editor:
- Name - Wedding reception, Corporate gala, Oakridge Winery.
- Area - the area on your schedule that events made from this template land in. Leave it empty if the template isn't tied to one place.
- Crew - one row per position: role, how many, start and finish time, and an optional hourly rate. A finish before the start means the shift runs past midnight.
- Tasks - one per line. They're copied onto every event made from the template.
- Runsheet template - optional. The event's runsheet starts from it.
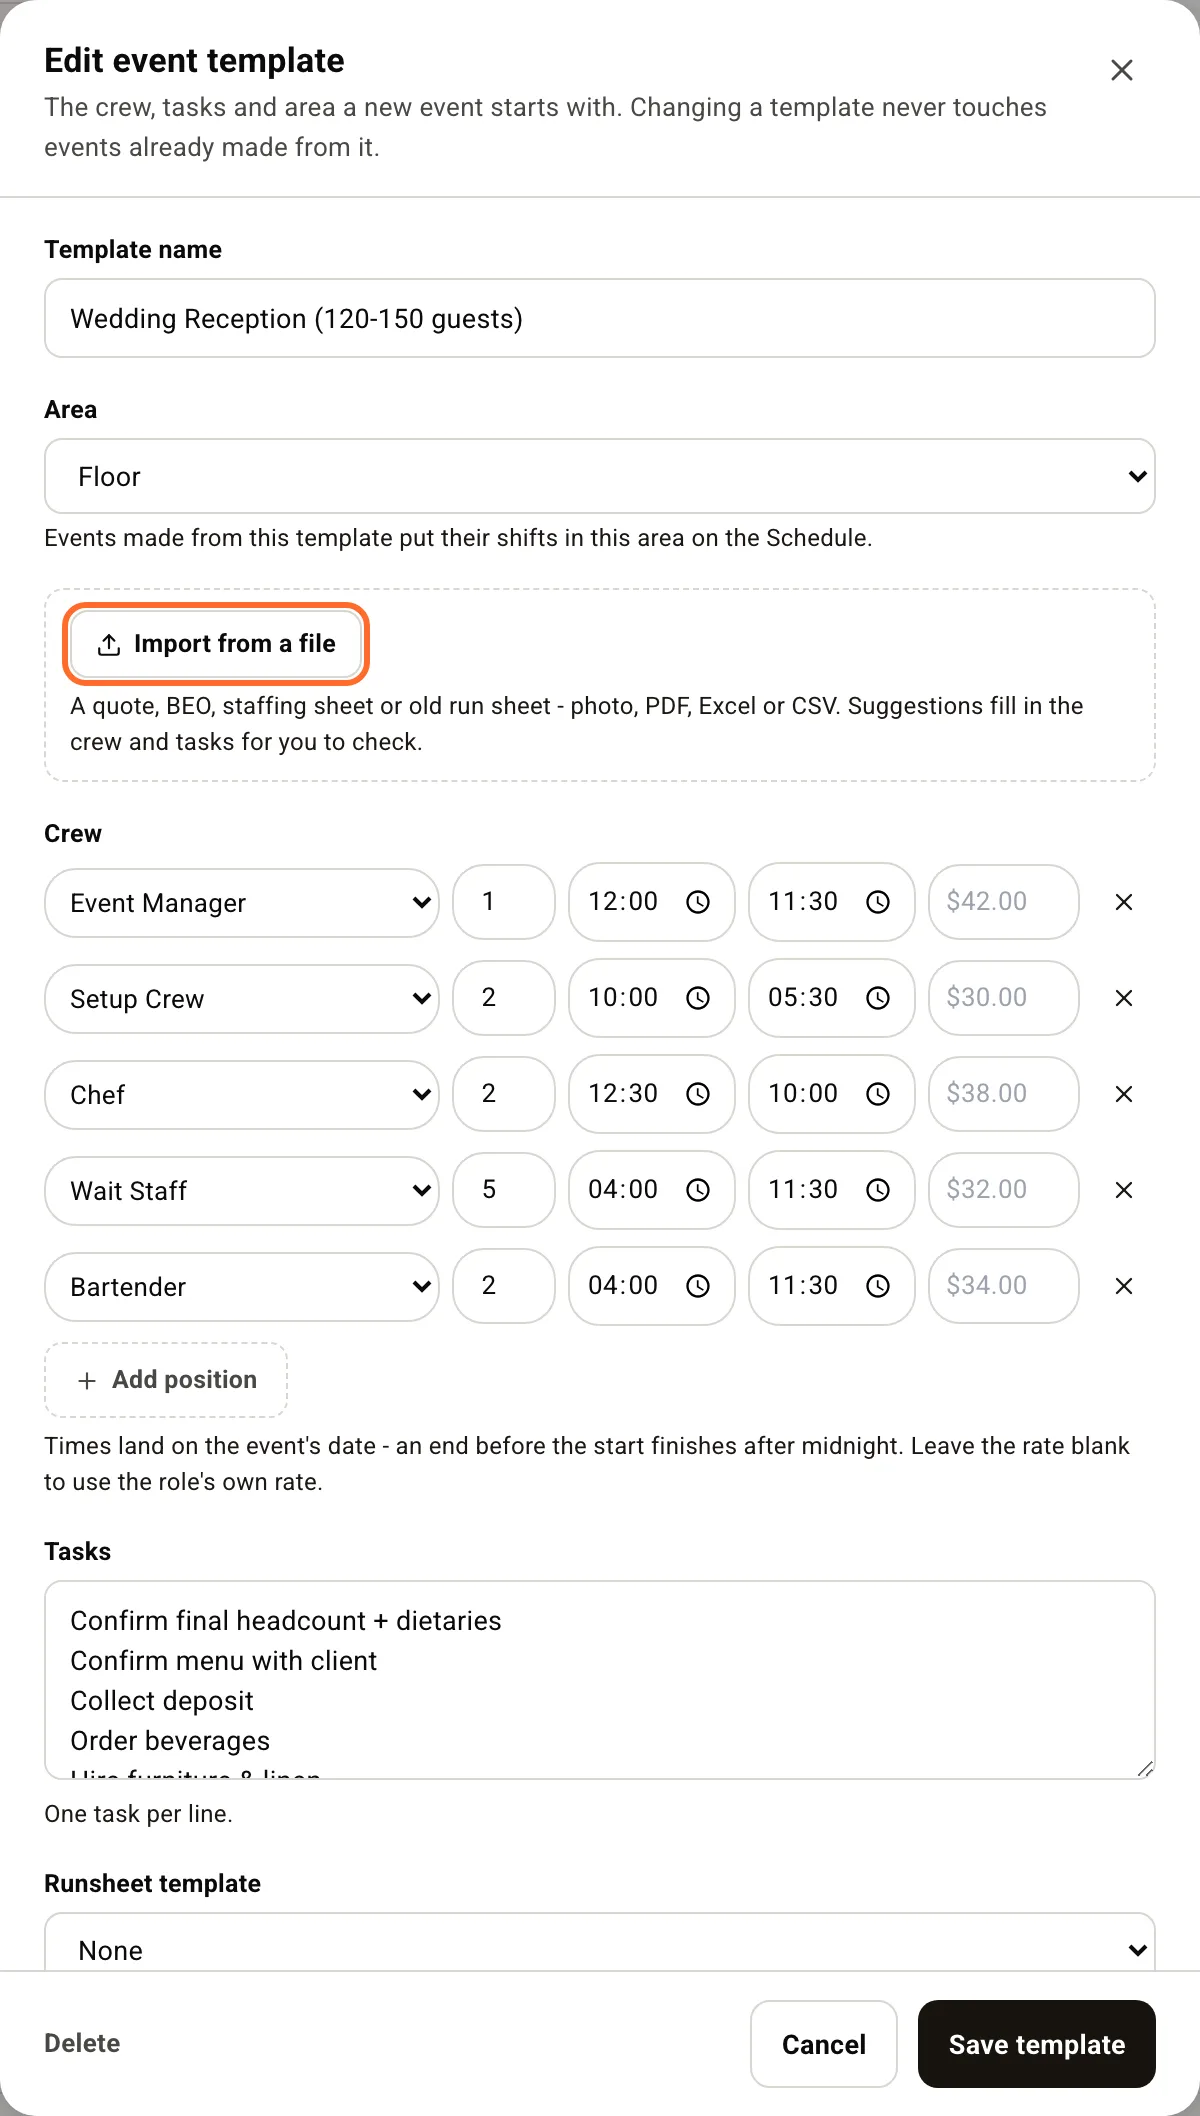
Click Save. Every card has an Edit button to change it later, and Delete is inside the editor. Editing a template never changes events already made from it.
Import a template from a file
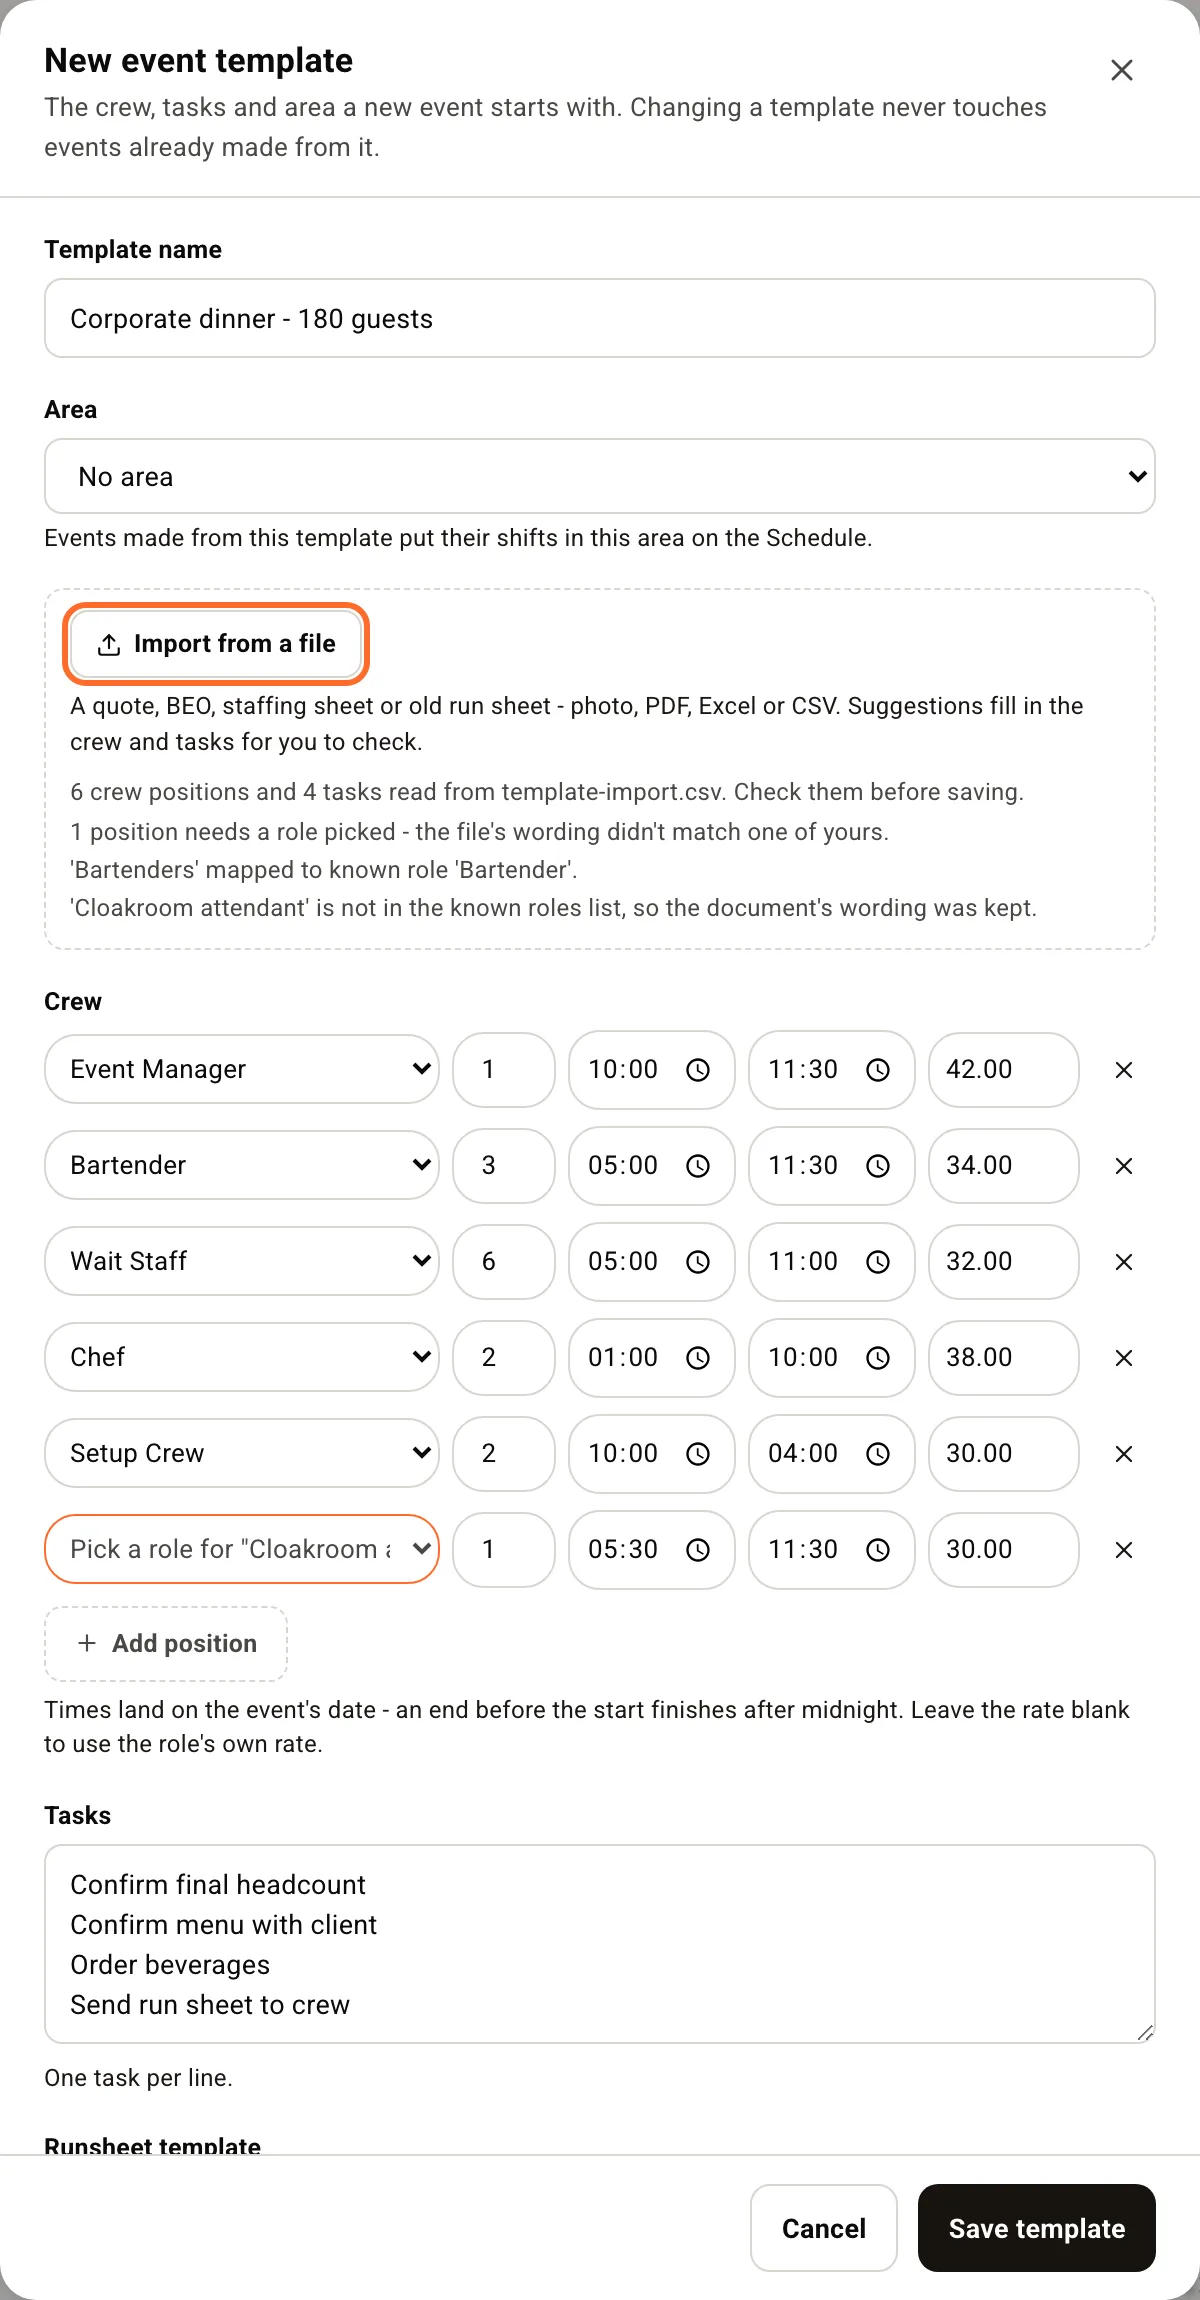
Already have the plan in a catering quote, a venue's BEO, an Excel staffing sheet or an old run sheet? In the editor, click Import from a file and choose a PDF, photo, Excel or CSV file. Word documents aren't read, so save them as a PDF first.
Suggestions read out the crew (role, count, times and hourly pay) and any planning checklist, and fill the editor for you to check. Nothing is saved until you click Save.
- A role that doesn't match one of yours shows Pick a role for "Waiters" in orange. Choose the right role before you save. Roster never guesses, because a wrong role would price every future event at the wrong rate.
- A time the file didn't give is left blank for you to fill in.
- Per-head or client prices are never used as pay rates. If the file only has client prices, the rates stay blank and you'll see a note saying so.
- Rows you typed before importing are kept, and tasks aren't added twice if you import again.
You can also save any existing event as a template: open it and click Save as template in its Staffing section. The template keeps the event's area.
3. Create an event
Click New event, or click a template card to start from that template. Fill in the name, client, date and times, guests, site and quote.
Area is pre-filled from the template. It decides where the event's shifts appear on the schedule, so the Oakridge Winery crew sits under Oakridge Winery. The field only shows if your venue has areas (set them up in Settings, Venue, Areas).
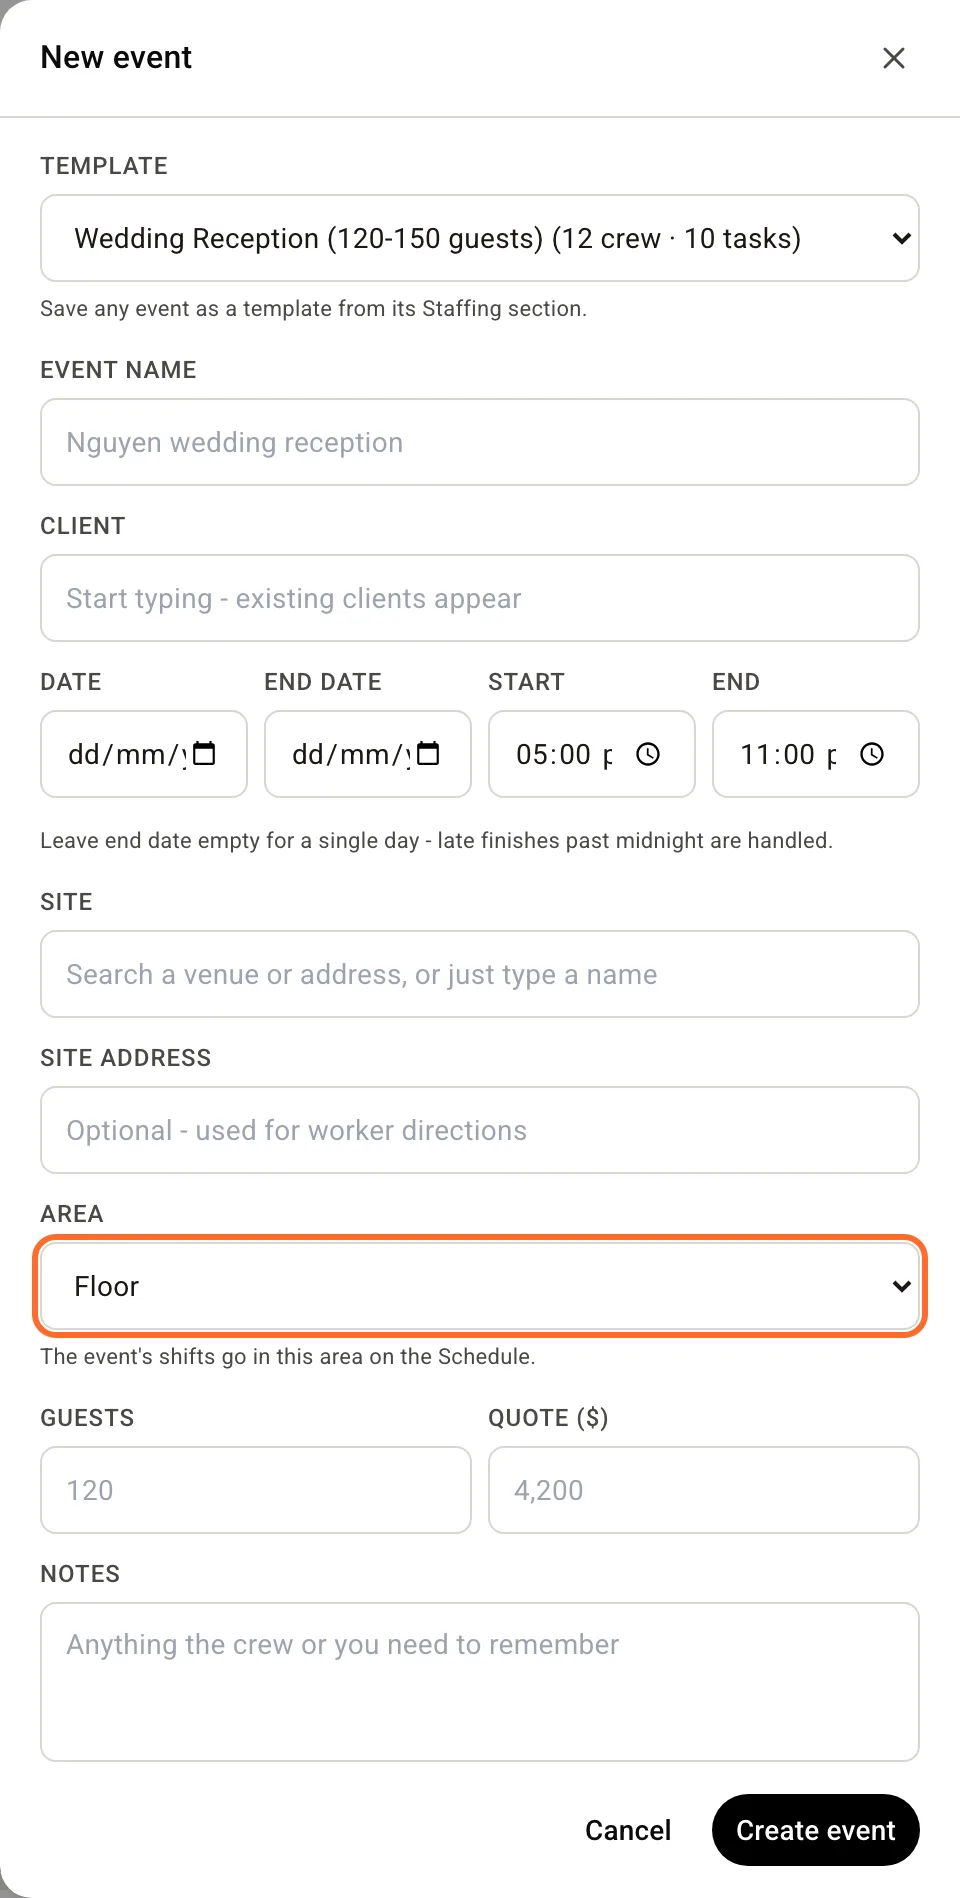
To change the area later, use Edit event. Upcoming shifts that are still in the old area move with the event. A shift you deliberately moved to another area on the schedule stays where you put it.
4. Plan the crew and put it on the schedule
On the event page, Staffing lists the positions. A template fills these in. Add position adds another: role, how many, times, and optional pay and client rate overrides.
Nothing reaches the schedule while you plan, so you can price an enquiry without creating shifts. The strip under the positions shows est. labour. If you charge staff out to the client, it also shows est. charge to client and margin.
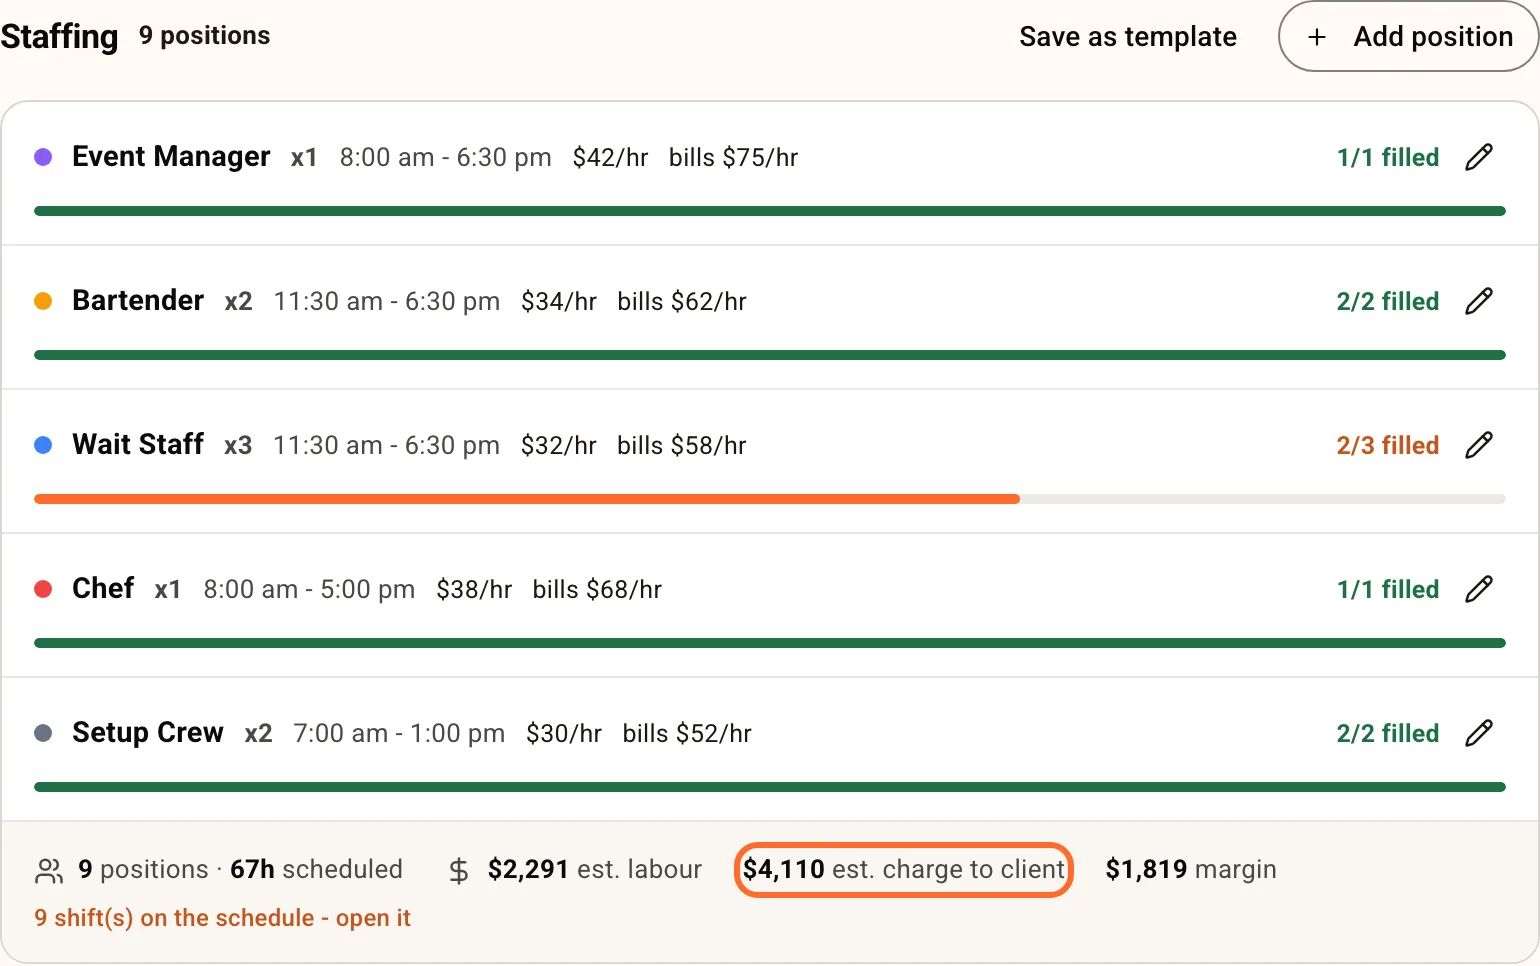
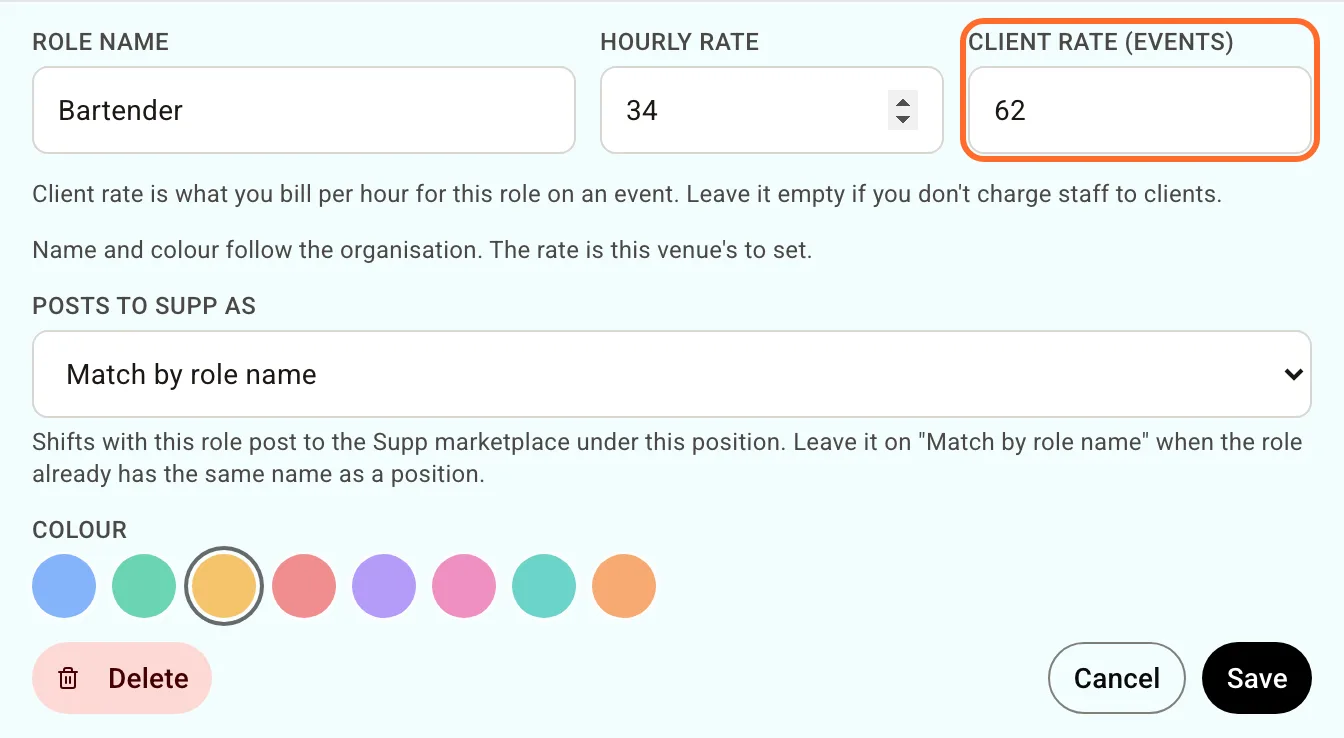
- Set each role's charge-out rate once, under Client rate (events) in Settings, Venue, Roles. The roles list then shows "bills $65.00/hr".
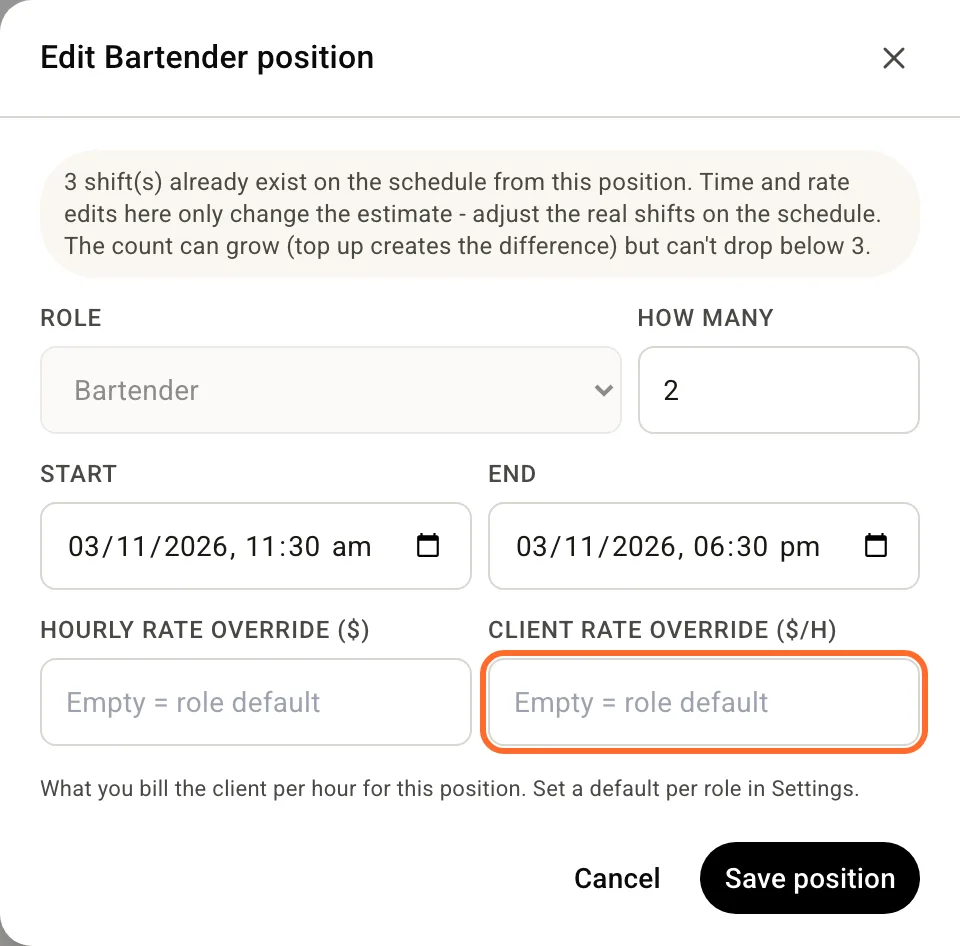
- Override it for one event with Client rate override when you edit a position.
- A
~and "1 role(s) missing a client rate" means some positions have no client rate yet, so the totals are partial. A negative margin shows in red.
When the plan is right, click Create N shift(s) on the schedule. The shifts appear as drafts on the schedule, in the event's area, and the card moves to Staffing. Assign your team, publish, or post unfilled shifts to Supp the same way as any other shift. If you add positions later, the button becomes Top up schedule (+N) and creates only the missing shifts.
5. Hand out tasks
Tasks is the event's checklist. Type a task, or tap one of the Quick add chips.
- The picker next to Add a task chooses who it's for: Unassigned, a manager, or anyone on the team. Your choice sticks, so you can pick someone once and add several tasks for them.
- Tap the name on any task to reassign it, or choose Unassigned.
- All and Mine switch between every task and only the ones assigned to you.
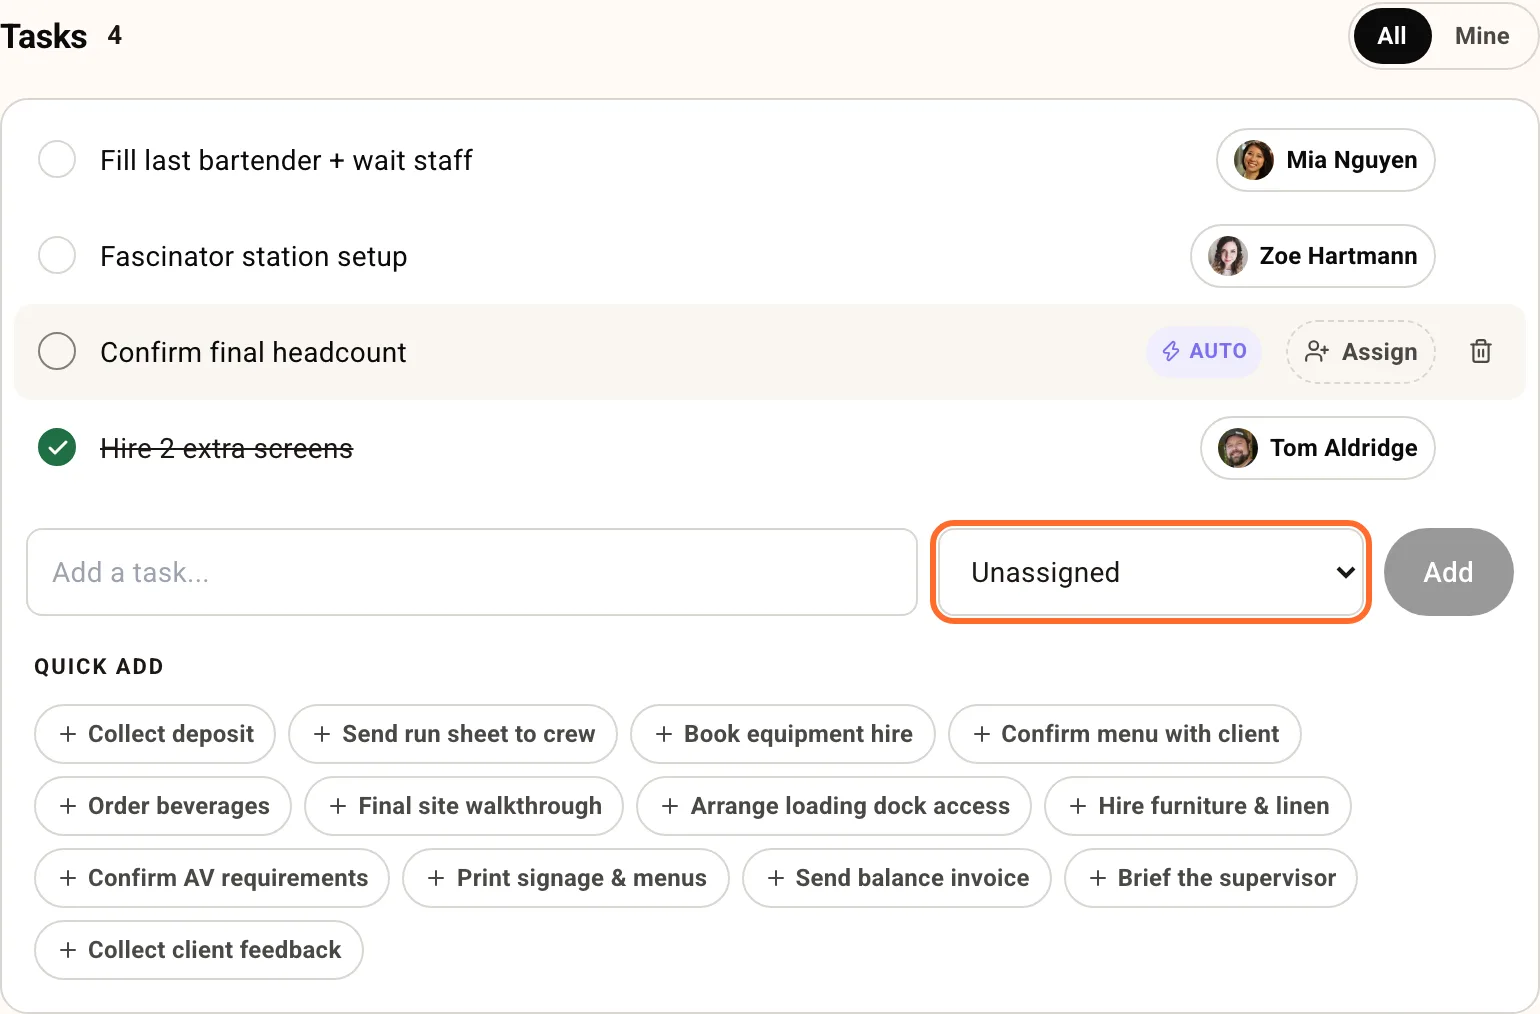
Assigning a task doesn't message anyone. Staff can't open event pages, so a task given to a staff member is for you to follow up in person.
Tick a task when it's done. Each assignment shows in Notes & activity, with who made it.
6. Delete an event
Delete event (right-click the card, or from the event's header) removes the event and everything attached to it: positions, tasks, notes, attachments, the runsheet, and any unfilled shifts it created. It can't be undone. Roster shows you exactly what will go before you confirm.
You can't delete an event that has sent or paid invoices, or one with staff on published shifts. Roster offers Cancel the event instead, which keeps the payment record and tells the crew.
Next: Brief your crew with a runsheet, and Take event enquiries from your website.